
Consistency is one of the crucial elements to success. Without consistency, you do not have accuracy or reliability. This applies to any business workflow, however it particularly applies to complex geoprocessing and data workflows for spatial data. Workflow management and tools to aid in complex data processing workflows are not a new phenomenon in the IT world or ArcGIS for that matter. Custom geoprocessing workflow creation is not new either, with well known tools such as the Esri Workflow Manager, Modelbuilder and Python script tools that allow for the creation of any repeatable custom geoprocessing workflow. However, what has been missing is a simple interface to tie custom geoprocessing directly into the map interface and the ability to call the full spectrum of ArcGIS tools and commands. Enter the ArcGIS Pro Task toolset. ArcGIS Pro Tasks take advantage of the existing desktop custom geoprocessing tools (Modelbuilder tools / Python tools) as well as the multiple-map capabilities of Pro to create interactive and well documented workflows for analysts. This article will first provide an introduction to the Pro tasks framework and its basic architecture.
What are Pro Tasks?
The second part will focus on our roundup of advanced tips and features that have proven very useful over time and that will allow you to optimize your Pro tasks.
Advanced Tips for Optimizing Tasks
What are Pro ‘Tasks’?
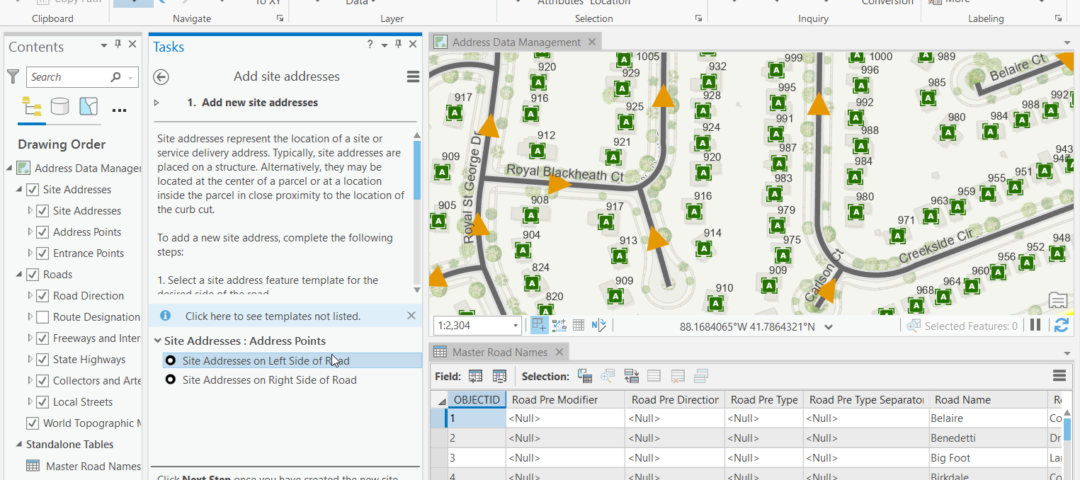
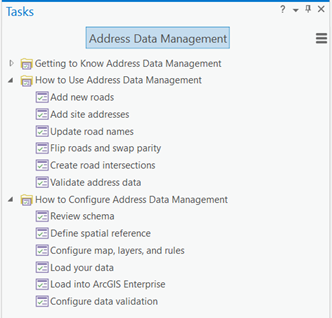
All ArcGIS Pro license levels and versions come pre-loaded with Tasks. Tasks can be used to create custom step by step workflows that can be shared amongst desktop users to build standardized workflows for common data processing and editing jobs across an organization. The Tasks feature can be accessed from the View ribbon. A set of Tasks can be saved as part of an existing Pro project or project template, or exported to an .esriTasks file for import into another project.

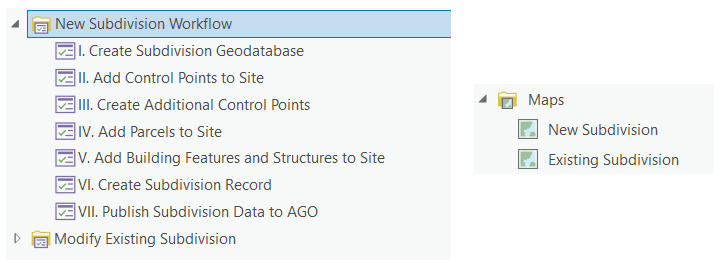
Each Tasks item can contain one or many ‘tasks’ that are then broken down into individual ‘steps’. Tasks can be solitary or organized into task ‘groups’ based on category or functionality. There is no single correct way to organize your workflows amongst tasks and groups, however it is best to understand a ‘task’ as a single reproducible workflow comprised of individual ‘steps’ (user actions, edits or tools) that are run in a specific order. Task steps can accomplish any number of actions, from calling ArcGIS commands, geoprocessing tools, custom tools, to viewing and selecting specific layers.
Tasks and steps are easily authored using the embedded Task Designer in ArcGIS Pro. When authoring each task, a detailed set of instructions can be left for each user that utilizes the workflow. In this way, tasks can also be used as a training tool to guide new analysts in the performance of your well established data workflows.
Advanced Tips for Optimizing Tasks
ArcGIS Pro tasks are about much more than just stringing a number of tools and instructions together. They allow you to automate most every aspect of your maps from layer visibility and labelling to the capture of attributes from specific records. The result is more reliability and efficiency for the user when doing repetitive complex tasks.
Here are some of the pro tips we find the most useful:
Start with Recording Your Workflow
Have a workflow with a long list of steps? The Pro task editor allows you to record your layer interactions, commands and geoprocessing tools and automatically build them out as task steps within your workflow task. It is highly recommended to start by recording your entire workflow. When creating a new workflow ‘task’, first click on the Record button, then proceed about performing your workflow steps. Each user interaction will be recorded and inserted as a step in the task. When you are finished with the workflow, click ‘Stop Recording’ to end the recording.
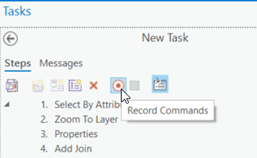
The recorder will record these items:
-Commands (think select layer, add data, open attributes, zoom)
-Layer visibility and presets
-Geoprocessing tools and parameters
This may take several iterations to get right, particularly if you have a complex set of steps. You can easily delete the previous steps and begin rerecording at any step. When creating new workflows we have generally found it best to make an initial recording of a workflow, then circle back to manually edit or insert additional steps in the workflow: Record a rough cut, then refine.
Be Aware of Absolute / Relative Paths to Data
This tip not only applies to your Pro task steps, but to Modelbuilder parameters as well. As mentioned earlier, Pro task steps can call geoprocessing tools. They can also embed these tools and parameters entries directly into the Pro task panel. Parameter entries, options and environment settings can be preset in each task step to streamline the workflow process and reduce errors or confusion for the end user. This is fantastic however it must be noted that if the parameter is a layer that is referenced using a path to folder outside of your project, this may cause broken parameter links when copying the project or tasks to another computer. Take advantage of the project home holder, registered folders and registered databases in your ArcGIS Pro project to ensure.
As an example, when referencing the root or ‘home’ folder of the project (this is usually where the project aprx file resides), use the shorthand dot (.) notation in the tool’s location parameter.
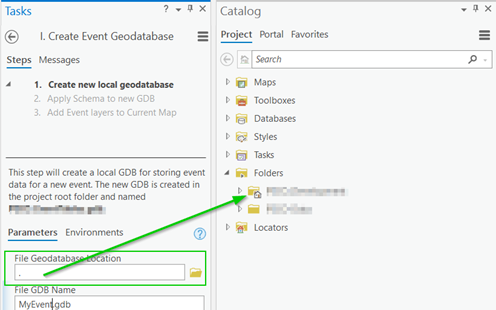
This is handy to ensure you are always writing data to a well known and visible location for the end user. The drawback of using the home folder is that it can get messy and cluttered over time. As a stopgap, you can add a task at the end of your workflow to copy completed data elsewhere and clean up your project’s home folder.
Use Separate Map Views with Preset Layers for Each Workflow
To reduce clutter and confusion, we have found it best to create separate maps for each category of workflow tasks. Different workflows may call for different sets of layers. When designing your workflow tasks, take advantage of ArcGIS Pro’s multiple-map support to create targeted maps for each workflow task. Doing so will allow you to reduce overall clutter in your map and table of contents, thereby reducing confusion for the end users. This does not necessarily imply that every task requires its own map. Only that you should think clearly about how tasks can share maps if they share common layers and functions.
Use Additional Actions and Verification
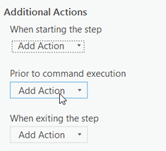
When looking at the Task Designer wizard, you may have noticed the ‘Additional Actions’ config options. These settings allow you to perform a series of actions such as selecting or unselecting records, or copying the attributes of a selected feature before or after the step. Actions can be performed when starting the step, prior to any command/tool execution in the step, or before exiting the task step.
The types of actions that can be added include saving a layer selection, copying attribute values from previously created or selected features, calculating fields for newly created or selected features and verifying selections and record counts. The verification action can allow you to ensure the correct number of records have been created or edited before executing a command or proceeding to the next step. If the verification fails, you have the ability to provide a custom error message to the end user.
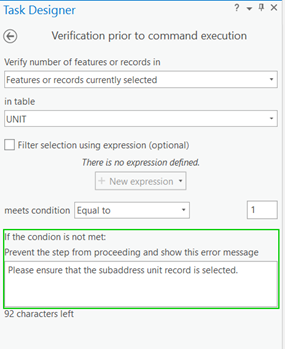
In addition, multiple verification actions and the other additional actions can be combined for each task step. This is can be crucial when making sure the proper edits have been made or selections have been created before moving to the next step in your workflow. And they can all be accomplished without having to write any custom geoprocessing tools.
Bottom line: ArcGIS Pro Tasks Increase Productivity
There are plenty of resources available that can help you become more acquainted with ArcGIS Pro Tasks and how to design stellar workflows. The ArcGIS Pro Online Help is a great place to start if you are completely new (can be found here “What is a task?”). In addition, Esri offers a free half day virtual web course for current customers called Automating Workflows Using ArcGIS Pro Tasks
ArcGIS Pro includes many new tools to guide users in efficient and accurate geoprocessing or editing workflows. ArcGIS Pro Tasks compliment this new paradigm by allowing for the simultaneous documentation and interactivity to guide users in complicated geoprocessing workflows with greater speed. If you haven’t leveraged the built-in capabilities of ArcGIS Pro Tasks to configure and document your organization’s data processing and mapping workflows, the time spent on creating them will definitely pay dividends down the line.